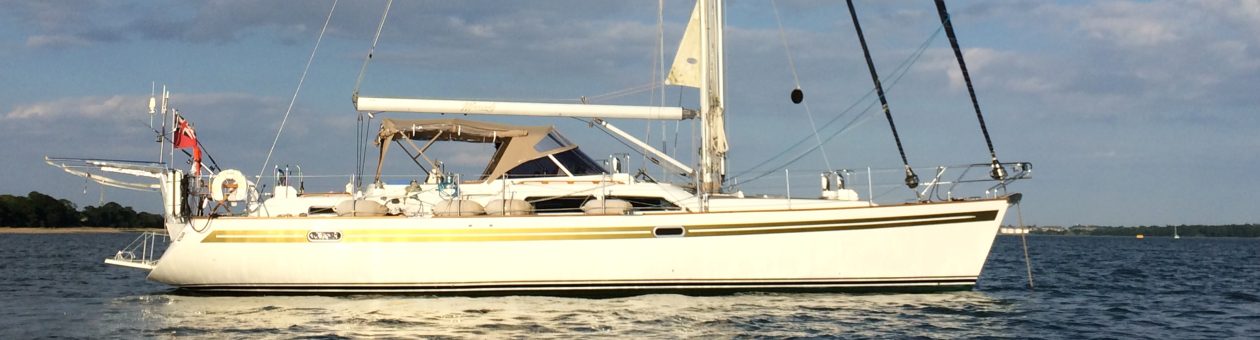
We like Mariadz to look good as well as being in good working order. So she gets a regular clean from us but sometimes you feel it needs a little more. We’re not OCD (well mostly), but we think, since Mariadz looks after us, we should look after her and make sure she always looks pretty.
This blog is about some of the products which we have found really help us. Firstly, windows. Back when we had a house, it had a gym and we had mirrors fitted along one wall. The conpany that fitted them did a great job but the mirrors were filthy when they were first put up. We looked on and thought “that’s our first job”. However, the team  from Kent Blaxill had different ideas and produced a cleaner in a white aerosol. A spray and a quick wipe and the mirrors were perfect. No elbow grease and no smudges or streaks. It was amazing and we have used their glass and mirror cleaner ever since. We use this on the windscreen and all hatches and we do think it comes up great. Well at least until the next spots of dirty rain!
Next up, the antislip. This was getting black dots all over it and looked filthy. I generally clean the boat down with car shampoo, with added wax, and a soft brush. However, this wasn’t touching it and the black spots remained.  Last year, I had addressed this problem with a nail brush in the direction of the grooves. This was back breaking stuff but came up well. There had to be a better way though. Going onto the forums and speaking to our neighbours came up with a mild bleach that would help and so we used the same as we had on the cockpit tent, Mould and Mildew Remover
 . I did use the nail brush too but it didn’t take as much elbow grease. I was also very careful to wash it off very quickly from the teak using a lot of water to dilute it as much as possible.
  We don’t want discoloured teak! This process is a lot easier to do but time will tell whether
  this the product has cleaned it or just changed the colour of the marks from black to white! Still the anti slip has come up gleaming and looks like new which I guess is the point of doing it!
Although, we refresh the teak using Wessex Teak Cleaner & Renovator every year or two, this is not something you do every week. We hose down the teak after a good trip out, especially if there has been sea water over the decks, and I will generally try to make sure the teak gets thoroughly cleaned using the hose. It is amazing how much dirt is just lying on top, although that may be because of where we are adjacent to docks. I use a soft brush across the grain so hopefully I am preserving my teak. She is a 16 year old boat though so I imagine at some stage in the future the teak will need to be replaced. Hopefully, we will be able to do that where teak is especially cheap as we tour the world.
Readers of the blog will be familiar with the stainless steel work we have had done. We have mast pulpits, solar panel frame, life raft holder, davits, pushpit, pulpit, main anchor, stanchions, dorades (or funnels), protection for dorades and a bbq holder! Now it’s payback time for all of these features – cleaning…. The stainless gets dull over time and water spots make this look even worse. We have tried a number of stainless cleaners and have generally found the clear liquid ones to be rubbish but the cream ones to be very good. So this weekend, Maria set about polishing the stainless and it looks excellent. We have yet to find the perfect product for this yet so any suggestions more than welcome.
Another trick which we discovered early in our boating career was how to remove black scuff marks from the hull. We discovered this when the day skipper candidate on the school boat we were on hammered the yacht into halfpenny pier at Harwich. We stopped and the skipper got out another cleaner, Cif Professional Cream Cleaner , this removes all those little pontoon scuffs to a reasonable state, at least until you can haul out and do the job properly! Of course the skipper didn’t let anyone else have a go, he decided that one accident was enough for that trip. This lack of opportunity pushed us to buy our own boat so it ended well.
 We have also noticed from time to time blue marks on our top sides. These may have been from the hose, the electricity cable or a blue sheet for our sails. Either way, these marks were incredibly difficult to get off. Much scrubbing ensued with no real progress. That was until we found Magic Sponges
 . These little white blocks remove the marks really well although they do waste away quite quickly – I guess we might use them a lot! They are also substantially cheaper than exactly the same product available in the chandlery!
So the only thing left to add to this blog in the future is how to clean up the exposed corner of main sail that pokes out when you have in-mast furling. This gets dirty over time. Neat car shampoo did a reasonable job but I have a cunning plan for how to fix this. I will update the blog with progress….. but for now that is how we keep Mariadz so clean!

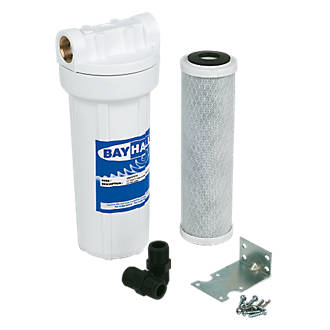 We bought a filter and have the option of fitting this in line with the outlet from our water tank. Instead we have decided to make sure that the water is clean going into the tank by buying hose attachments (quite posh ones). Having emptied the tanks before refilling with the new filter, it took two flushes of the tank but the difference is unbelievable with no smell of chlorine.
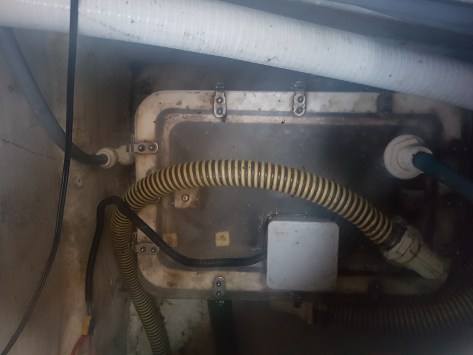 I open up the grey water box expecting to see the switch stuck in the up position and jammed with the white soapy scum. It’s a little dirty but not too bad and the switch is down. Hmmm. Now to check if this is a problem in the switch or the pump. It doesn’t take long to determine that the float switch is the problem since it seems to be powering the pump irrespective of its position, although interestingly more power when the switch is activated. Our friend Mark pops over and is also keen to understand the problem. Using a multimeter we can see that there is some power even when the switch is meant to be off. It’s a sealed unit, and relatively inexpensive so we decide that we will replace it. Maria will be shopping at Fox’s chandlery tomorrow morning. In the meantime, we can use it as long as we do it manually at the wall, not ideal.
 The next day and Maria has bought two
 We decided to do this using teak oil that we bought from the original manufacturer of the chairs although any teak oil would have been fine I’m sure. The instructions were to make sure the teak was clean and then to apply the oil using a soft cloth. You could tell how important it was to Maria since she was right next to me doing a chair :). You can tell the difference in the picture where the work is part done and we were so pleased that we decided to do the same for our teak table.
  Unfortunately the preparation of a dirty table that we have had for a few years was a bit more intense. We used teak wonder to remove the dirt from the table and then did the same with the teak oil. The most difficult part was getting the teak oil into all the nooks and crannies of the open mesh table, it took time but was worth it. The process doesn’t take long especially with two of you but I imagine we will have to do it again towards the back end of the season.


 Pulling the two wires that feed the meter out was harder than I thought but revealed the problem. We had twelve volts across these when the circuit was on but no clicking of our counter.
 The advantage of having a similar design was it fitted into the existing hole perfectly. A quick test with the ignition circuit on and all is good – proven completely when we went out for the weekend and ran the engine for 4.85 hours on our way to Hamford Water.
 With a weekend away planned, Maria decided that we would also be doing boat chores. This week she wants to clean the stainless steel, all of it, which is why I cursed our friends at ECS! if they didn’t do such a good job maybe we would have less to do.
 pulpits, eight cleats, two davits, one anchor and a solar panel frame. Not all of this has been done by East Coast Stainless but that won’t stop me blaming them 🙂 . I need to check what the guys use to clean up stainless because it always looks immaculate after they have done it but for us
 The alternator is fixed to the engine by two bars, one at the top which holds the generator in place and one at 90 degrees at the bottom which provides the adjustment to tighten the fan belt.
 Finding a suitably plain net was easy enough and we only need a couple of square metres so not too expensive. The last task we want to do is to weigh down the bottom edge but in a way that the cats can still push past. That is assuming that they are brave enough to try – Clyde.
 So mould and mildew was applied, scrubbed and then washed off with lots of water. Afterwards, all of the decks were washed down so hopefully we won’t get any bleaching elsewhere. This didn’t take too long and using lots of water and a couple of applications has really brought the sail back up. I am almost tempted to try another application in a few days but the current results can be seen below. Maybe a need for a little more effort on the bottom of the sail….


 It is a very smooth manoeuvre from the lift crew, Mariadz does look good as she slowly moves across to the lift, and before long she is lined up and the lift can start. After a couple of false starts and a consultation with the manual to check for lifting points, she is up and we can see that there is a lot of growth on her especially since she has only been back in the water for four months. That said after some of the issues we have had, we probably haven’t taken her out as much this year so far.
 Maybe these were enough to cause the slight vibration we could hear in the aft cabin when under power. Definitely something that requires more investigation. The original keel cooler was completely covered up with barnacles which explains why this wasn’t working but we need a new one anyway because of the leak. While Paul from Haven refrigeration is on board, he can also fit the PCB for the forepeak aircon unit. This was tricky to order from HFL, but google translate was my friend and we were able to get everything sorted via email – let’s hope i have right one and it works!
