We have described previously the ambitious build we have planned in Puglia. The plan is to have our roots in Southern Italy where the people are so friendly. The cost of living is a lot lower than the UK and it is possible to buy a nice retirement property for the price of a flat in Southern England. It is also easy for a pension to go a lot further than in the UK. Did I mention the weather is a lot better too? And the food and the wine….. So lots of great reasons to try Puglia!
My parents had a similar dream but wanted to live amongst the Spanish in Spain – rather than in an English resort in Spain. They have retired to Extramadura where they have been embraced by the Spanish and have learnt the language. We intend to do the same (except learn Italian 🙂 ) in our own small corner of paradise. The advantage of doing the build early is that it gives us an income during the summer months and Trulli Mariadz will be available to rent for a number of years. Please book early to avoid disappointment, maybe wait until it is finished though 🙂
The project has been underway for a couple of years with Trulli Dream Constuction. Now it should be said that the pace of construction has been slowed by us and not by the Italian company. We also talk about ‘Italian Time’ which in our experience is generally the exact time you say, ‘English Time’ seems to be a little after the arranged time…so that is another stereotype blown!
We have been very happy with the company building for us and know the family well. As part of this we have put our trust in our Italian team and Angelo Epifani 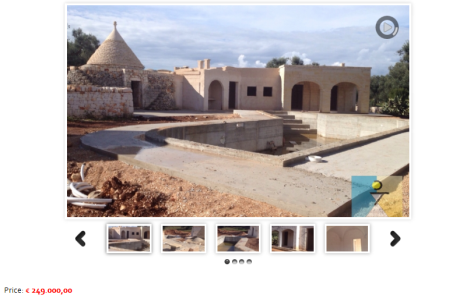 deserves a special mention for being so amazingly helpful and kind to us over a number of years. He is one of the leading estate agents and works at Oasi dei trulli immobiliare (the link shows the current available property in Puglia and the picture above is just one of the properties that is for sale at the moment) with a complete knowledge of the area combined with an honest assessment of the pros and cons of each property. We have also found Massimo and Pino very helpful and hard working throughout the process. One piece of advice we would give on this is that the people who have struggled buying property in Italy have generally tried to impose UK property practices over the top of the Italian way. One even instructed a UK solicitor. We have found that element of trust and faith helps immeasurably and promotes the goodwill that is always required in any successful transaction.
For instance our planning permission required a large number of updates and negotiation to pass through planning control, which still took two years. Without Pino’s commitment and constant visits to the office this would have been impossible. I’m sure his wife thought he had moved out at times since he was spending so much time in the office. Then the build started with a documented timeline. Unfortunately we had to delay the build after we had started while we got some money together and Massimo, our Geometra, was very understanding and flexible. The great thing is that we are having the building work done by new found friends who are as excited about the project as we are. That shared vision combined with commitment and honesty has resulted in a trouble free process.
The design of the house was a combination of some ideas that we had from the UK and local building designs. The master suite consists of a six cone trulli with a bathroom, seating area with fireplace, dressing room as well as the bedroom itself. This is the last part of the build to be started and the stones that comprise the round houses has been delivered and the work will start as soon as the weather improves enough. To the rear of the trulli is a private ‘English Country’ garden with a grassed area. This will be our little homage to our home country with all other aspects being from our adopted home.
The rest of the house is pretty much complete. To provide greater privacy the rooms adjacent to the master suite are the dining room and the utility room. These will not be used all of the time and means this part of the house will be tranquil and quiet.
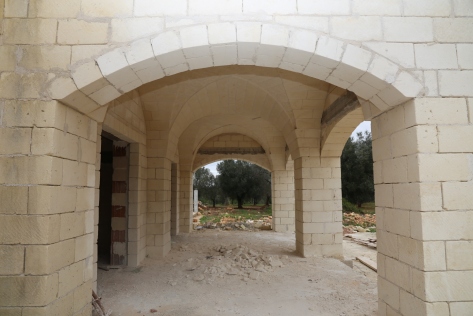
 Moving round to the front of the house, there is a large entrance area with seating which is flanked by the kitchen and study/additional bedroom. This part of the build are all lamia with curved ceilings. In front is the lounge area with a small games room to the left, with our pool table from the UK! Between the kitchen and dining room is a staircase down to a small basement which will have a storage area and some gym equipment, useful for people who can’t resist the pasta but still want to get into their clothes at the end of the holiday!
  From the entrance to the right is the corridor that leads to the remaining bedrooms, study, main bathroom and garage. The two bedrooms that face the rear of the property have star ceiling designs, as well as their own private seating area under shade.
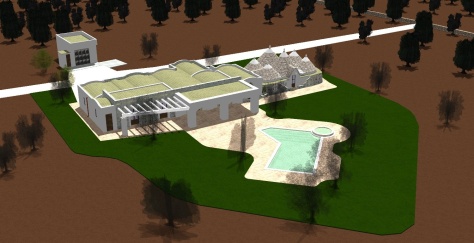
Returning to the centre of the house, as you head out towards the pool there is a large fixed structure with star ceiling designs providing a covered outdoor area that is usable all year round. The patio area leads to the swimming pool. The left side of this is a large area of steps which will allow people to be in the pool sitting and chatting if they like. The rest of the pool is one level and so ideal for games but  not for diving. Finally there is a jacuzzi within the pool which maybe a good spot to watch the games for those less energetic.
To the right of the pool is the outside kitchen area which allows al fresco cooking and includes an oven for pizzas.
The whole build is surrounded by several hundred olive trees, which are cultivated and harvested in the traditional way and also provides the delicious Mariadz Olive Oil. There are also a number of fruit trees dotted around including Cherry, grapevines, fig, orange and lemon, required for Mariadz Limoncello.
At the front of the house is another staircase which goes up to the roof.  This area can be used as another private sunbathing area although some of the roof is sectioned off for the solar panels that help to provide the power for the house. The roof also offers stunning views of the surrounding countryside with the entire area covered with Olive trees and a few small houses dotted around. One of these is the piccolo casa. A self contained one bedroom apartment on the other side of the driveway.
The entire plot is surrounded by a traditional wall and privacy screen with automatic gates at the entrance. A 24 hour security team is in place that monitor the alarm systems and respond very quickly as required. There is also CCTV to the outside areas which again adds to the security.
The pictures show that the build is well under way and hopefully it wont be long until it is completed. I will update as we make more progress. Anyone interested in learning more about Puglia and what is available please contact Angelo (info@oasideitrulli.com) who will be very pleased to help no matter what the budget. I’m sure if you mention Maria and Adam, he will be especially helpful 🙂


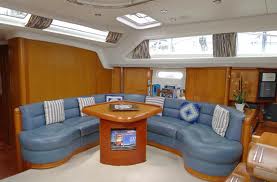 We looked at a number of options over a long period of time. Removing the poor veneer on the table showed more fire damage and the original wood was blackened from fire. We had success previously with the walls of the saloon being re-veneered and so we tried that, although the main part of the table was fine, there was a problem where the veneer got to the edges where the fiddle (grab rail on the edge of the table) was. We looked at whether we could put a fill in the corner so that the edge of the veneer would not show but everything we tried couldn’t deal with the very tight curves on the corners of the table.
 This unfortunately meant that Maria wanted something that wouldn’t look out of place on one of these. We spoke to a few people and Kevin was recommended to us. Kevin discussed options and he agreed that he could do something special with the existing workings of the table that would be a centre point of the saloon and would give Maria the table that she really wanted. Kevin spent a lot of time on the table and designed it with two compass roses when the table is extended with the fold out insert in place. When the table is smaller it has a single compass rose. Kevin quoted for the work and we were happy. We subsequently found out that he is a bit of a perfectionist, hence why Maria likes him so much 🙂 and he took the time to do a really good job even though it coincided with the birth of his child. He cant thank him enough. While the job was being done, Kevin had left us with a plywood top to our table base so that we could still use it while the work was being done. In March, the work was complete and despite having to delay the install for a week because we were away, the install was ready to happen on the 19th March. Kevin had offered to send photos through but Maria was unequivocal in her desire to see the table for the first time when it was in place.
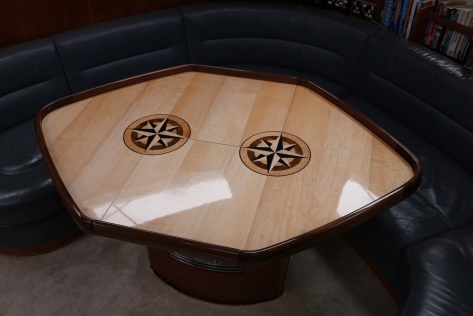 We are really, really pleased with the results.


 The upgrade was to use the toilet version of this pump. This is equivalent to the more powerful of the two grey water pumps but has a much wider pipe, let’s not linger on why that is required for a toilet pump…..
 (the ones that disguise screws and make them look like the headlining or woodwork. These had jammed across the pipe together, which was little wider than these at the bend. This stopped all flow, especially as they had been packed in with hair and assorted other gunk. On cleaning this out we put the whole system back together and tested.
 gets you one of these stainless steel little puppies that fits the plug hole perfectly, has a very fine mesh that catches rice grains etc and looks like it is standard fit. So all those problems could have been averted for less than two pounds….
 of course throws the compass off 😦 . we looked at the design of the standard steering column and were a little confused. Engine hours is important to keep an eye on but does this really need to be on the helm? We decided to move it down below. There were also some redundant switches. By carefully rearranging the steering column, with Olly from Seapower’s help, we were able to come up with a better design that also fitted in the chartplotter and the control panel for the Forward Facing Sonar. The radio bracket has been moved
  away from the compass and the new remote control for the autopilot has also been mounted on the pedestal. Another change was removing the standard key to start and replacing with two buttons. At the end of the day the keys are all standard and so add no security but can handily (?) break off in the ignition at times. We just need to make sure that the ignition is switched off from the master control down below to avoid someone taking Mariadz away. Finally we added LED lights to light up the table when needed.