Lots of people brag about how fast their boats are and most of the time it is light hearted banter. We have such a conversation with our friend Stig, since we chased his boat Wild Dream 2, up the Wallet when returning from Burnham on Crouch one time. We gave them a one hour head start before catching them up and it has been a joke shared ever since. It is only recently that we admitted motor-sailing 🙂
So it has often been said (by us 🙂 ) that Mariadz is a fast boat (she’s not really but don’t tell her that!). However, like a formula one car the problem with this speed is the potential for lift at the stern and therefore downforce is important if we are going to make sure that the rudder stays in the water 🙂 . Clearly the last thing you want is the stern to come out of the water when she is going really quickly! Reason number one for the work we have had done.
An alternative reason is that you have the davits at the back of the boat with your nice rib hanging from them and if the boat is your home then your rib is really the equivalent to your car. Ideally you would want your car to have a garage or car port to protect it from the elements? So Maria may have wanted a “rib port”, a little shaded area where the rib goes and is protected from the sun like a car port protecting it from UV damage. Reason number two.
You will have seen on some of larger yachts a helipad so the billionaire can get to the boat by helicopter. Now clearly Maria is not going to have these gin palaces having something she can’t have on Mariadz, so does the top of this structure have a large H on it for landing the Chinook? Reason number 3.
Mariadz is also famous for its parties and high alcohol cocktails and the aft deck is a perfect place for a little soiree. Is this the high level drinks tray so that the drinks don’t get knocked on the deck? Reason number 4.
The final alternative is that if you are cruising long term you need to be self-sufficient for power, or as close as is feasible, so you need to look at wind and/or solar power. A lot of boats create a stern arch on which solar panels can be mounted but these can look quite ugly and intrusive. We currently have davits, rated at a high weight capacity, and these are attached to the stern with a large number of heavy duty fixings. We therefore decided to fit a solar frame above the davits because of the chance that this area will be unshaded and hence give good power and it is out of the way. We are fortunate that because of the size of the boat, our davits are fairly wide apart which provides a good 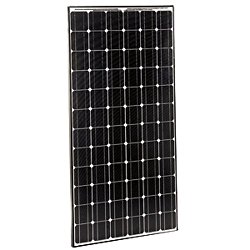 solid base for the solar and also allows us to have three large but lightweight (240W) panels which were Panasonic – HIT N Series 240W Black Solar Panel
 . We think this is a sensible amount of solar for a large, power-hungry boat although we will be also be looking at further ways to reduce our consumption. An alternative would have been to have a small wind turbine fitted to the boat. You will see this on a number of cruising boats but to get a good charge you need some wind, normally in excess of 20knots for any meaningful contribution. Maria and I discussed this and decided that we would generally prefer to be in an area sheltered from wind if possible. The other disadvantage of wind turbines is that they are quite noisy and are also likely to cast a shadow over solar panels that would impact the solar performance so a mixed solution may also not be great. So it was agreed we would go with a solar array matched in Watts to the amp hours of our batteries (720W and 880Ah of battery power). Reason number five and the best reason! although I quite like the helipad idea……
When designing the frame, we were keen to make sure that we still had access to the boat from the stern using the passerelle.  This would mean that we would need to have a certain amount of headroom and the frame couldn’t be mounted directly on top of the davits even if we had wanted that. Another reason it needed to be raised would have been the console on the rib which sits proud above the level of the davits. These reasons, and aesthetics meant we wanted to have something that felt balanced with the boat. We worked with East Coast Stainless on the design and came up with a design that we think works. One of the design questions was about being able to tilt the mechanism, which is more efficient for solar (and creates more downforce, returning to a previous train of thought 😉 ). However, we had concerns that this would be cumbersome, heavier and fail over time as the combination of salt water and stainless welded the tubing to itself. We had exactly this experience with a telescopic boat hook that wouldn’t budge after it
  had been immersed in the sea and left for a few months. As part of this work we lost the Neptune’s fork that used to be mounted here but we had already moved or replaced most of the aerials that were on this and we didn’t want this to still be in place and potentially shade the panels. Some of the aerials were better mounted on the mast anyway. A few were left over which are mounted on plates to the side of the panels, providing a little shading but hopefully not impacting our solar output too much. When the fork was removed the davits suddenly looked naked until the frame went on, it was strange.
Finally on the exterior, we have added some lighting to provide a “welcome” light for the swim platform, a courtesy light for the aft deck where we quite often eat in the summer and finally relocated our aft navigation light to the far side of the solar panel.
Electrically, the work was again done by Olly at Seapower bur most of the solar power work was done when we did our refit last year. We  had looked at how the power went into the batteries and had agreed with Olly on an MPPT controller which maximises the power going into the batteries by being very clever (please tell me if I am being too technical!). It takes a high voltage as an input and then converts this to the lower voltage required by the batteries. We went with the blue solar set up which is supplied by Victron since we had other Victron equipment and this gets great reviews. It also comes with a Bluetooth communications module which will allow us to monitor the solar array in its own right. All of our on board monitoring would give us a nett effect after any load had been subtracted, unless of course we switch off everything on the boat….so the ability to check the solar in isolation is useful. But it is also useful to know whether your batteries are being charged after considering the current load as a baseline.
I will update the blog with some real world figures in differing conditions but since we will be generating our own power, we are expecting our electricity bills to also come down because of the solar array. W ith just one panel connected up and with rain water on the panel, which impacts efficiency, we were getting 4A going into the batteries which is all electricity we don’t have to buy off the marina or fuel for the generator. Now you even get money-saving tips from Mariadz 🙂
So a few weeks later and having had the three panels giving a total of 720W fully working for a week, I can now see how well solar will work for us. During the week we changed our orientation to the pontoon, facing South rather than North but I haven’t seen any noticeable drop in yield based on this move. The other key factor is the state of charge of the batteries, clearly if they are full we will not get a fair representation of how much power was available. I have been able to ensure that the panels are in bulk charge mode most of the time by switching additional load on when necessary, mostly the immersion heater or a kettle.
One thing I have noticed is that I now think of our electrical capacity differently. We are a 24V boat with some 12V and obviously some 240V, and like the Victron I have been working on KWh since that is easy to consider irrespective of what I am looking to use. So our 880A of 12V batteries is 10KWh of battery capacity and this means we have effectively 5KWh of power available to use from the batteries before charging.
The maximum power we have had from the panels was 668W, nearly 28A at 24V and 93% of capacity. Over a full day we have had a maximum of 2.5KWh… in the UK, in September which I think is pretty good!). However, our average is 1.75KWh since we have had some cloudy and dull days. These represent the panels giving between 22% and 31% of their rated wattage each hour. All of this gives me confidence though that we have sized our array well. As we get into warmer waters, the sun is better positioned and it is brighter, I would hope that we would do better than a September’s day in the UK, possibly twice as good but that is one for the future.
This is also one of the last major projects that we need to do to the boat as preparation for the big trip, so apart from rig and sails she is close to being ready to go 🙂

 However, the standard Moody 54 doesn’t have much pushpit space with two liferings, a danbuoy and, for us, a life raft already on there. With the davits also restricting options and two two aft seats taking up more room, it is a little tight to say the least.
 which gives us more room and a safer aft area. This would also provide more rigidity to the pushpit when combined with the reinforcement we put in the stern section previously when we added braces from the davits to the pushpit. The final item we needed to think about was the repositioning of the ensign required by the new solar panels. This was also intended to be rail mounted although I was keen to go back to a wooden pole rather than the stainless one we had previously.
 The finished job looks like it has always been there, just waiting for safety lines to be adjusted so that we can finish this part of the job. The best part is you cant see the join between the new and old elements of the pushpit, very happy with the workmanship again!
 original hydraulic rams, Bennetts in America. After sending various pictures and measurements, they were able to find the rams I needed (HL12CDA). I then had to wait for the next available transport to the UK, unless of course I wanted it delivered airmail which would be double the cost the of the rams themselves! I waited. The rams arrived and were ready for fitting and then I discussed with Lindsay when we could go about fitting them and getting the system working again. In the interim, Matt, a marine engineer and very good friend of ours, was visiting and I picked his brain. He persuaded me to do the ram swap myself and actually this transpired to be a lot easier than I imagined. I then needed to add hydraulic fluid (automatic transmission fluid) into the reservoir and bleed the system by using it and adjusting the flow to eliminate any air left in the system.
 Most of the pipes are metal sheaved flexible pipes but there is one copper pipe and unfortunately the (olive) joint was faulty and hydraulic fluid was squirting out of it and making pretty patterns in my lazerette. I took a look at this with Lindsay at Seapower and we discussed how to resolve the problem. The sensible decision was to replace the copper pipe with a new stainless steel flexible pipe. I went to the local specialists, Pirtek. After one false start, when i pressurised the system and the new joint failed spraying hydraulic fluids everywhere, we were able to pressure test the remade pipe and get the hydraulics sorted. I was back to being able to lift the platform but not drop it. Most importantly, after nipping up a couple of joints, we don’t leak even a drop of hydraulic fluid.
 We wanted to have something that you could brace yourself against, for when you are working at the mast. Although with in-mast furling, you do spend less time at the mast than you would with the lazy jack system we had previously. An added advantage would be that this could also be somewhere that we could store our fenders, rather than on the pushpit or along the decks. We looked at a few designs and were keen to have something that we could hold ourselves against while still being able to reach the mast and also use the winch on the mast if necessary. It would also provide a useful hand hold when walking along the deck. I noticed this when I was walking back when they were placed there for show and naturally grabbed it for support. 🙂
