We have spent the last two weekends away, firstly in Lymington, attending a seminar about blue water cruising and then to Italy to pay taxes, speak to builders and check out the house. We therefore decided that we would have a weekend away somewhere quiet and decided that a few nights in the River Stour would allow us both to relax and chill. It would also work out because we were expecting to see my son, Matt, over the weekend and it would be easy to pick him up from Harwich. Maria still had to work on Friday but we decided to leave on Thursday since our setup allows her to work from home wherever we are.
It’s a beautiful evening as we head down the River Orwell and start to discuss where to stop. We can either pick up a mooring buoy at Levington or anchor either at the bottom of the River Orwell or the top of the River Stour. We decide to keep going to the anchorage opposite Harwich Parkeston Quay at the top of the Stour adjacent to Shotley. The trip down is mostly uneventful except Maria starts to think the engine doesn’t sound “right”. I go below and notice on the electrical panel that we are charging the batteries intermittently. This is changing the tone of the engine which is what Maria heard. I start to investigate and everything seems to be ok as we continued but I recognise that we will have a job to do when we return understanding why the charging is not consistent.  As we pass Shotley we notice our good friends the Thompson family from Ipswich, coming back up river. They have taken on an amazing project and are living aboard while they renovate their boat before going off travelling. It is an ambitious project but they are committed and we are really pleased to think of them as friends.
 We anchor in a familiar spot and have a quiet evening.
  The traditional arrival drink, a beer, is ready and this time in our new hand painted glasses! We also got some good news about a potential new role for me so all is right in our world as we settle down to a dinner of steak.
The next day starts well from a weather perspective and I am checking over the boat as Maria works.
I even break out the hammock that we have had for eighteen months and think about how to rig it. Maria has always been worried about the pressure on the headsail of rigging it to there, which we have seen a number of times previously. I had noticed that Simon Thompson had rigged a spinnaker line to take the vertical pressure from this setup and thought by using two spinnaker lines and a cleat I could rig this so that both the horizontal and vertical pull was held by two different lines, sounds perfect in principle.  The other end could be held on a masthead cleat and I have been able to set up the hammock in a way acceptable to her majesty, siting on her throne at the chart table.
Between work calls, I am able to distract Maria enough to get her to try out my new setup (having checked it first, can you imagine the trouble I would be in if it failed!). Maria agrees to give it a go. I have video evidence. I also seem to have a court order which bans me from sharing said video evidence.
Anyone who has read about our rib will know one of the main issues we were trying to address was to allow Maria to get in and out with some decorum since she seemed to spend most of her time in an inflatable lying on her tummy with her bum in the air! She also struggled to get out of the Lotus Elise when we had it, with a common outcome being a loud thump and Maria picking herself up off her hands and knees….in front of a packed pub garden. Cool. So with much noise Maria gets into the hammock and we are all good…the camera is still rolling….she starts to get out. Let’s just say that the first thing to hit the floor was her left hand, and she tried to get out on the right hand side. The final shot of the video that you are not allowed to see is Maria reversing back to the camera as she stands up….. close up and fade to black! I don’t think the court papers specifically excluded a description of the events. If they did my next blog will be from a police cell.
It gets towards the end of the day and Maria is finishing work. The anchorage is nice but is opposite a commercial port with ferries coming in and out infrequently. if we head down the river, it is very quiet under the Royal Hospital School. It’s been a glorious day but some clouds are to the west of us where we are heading. Maria points out that they look pretty evil but I check the wind direction which is gently blowing towards these clouds and point out that unless they are going against the prevailing wind direction, we’ll be fine…..  Maria is not one to say I told you so but within ten minutes the rain is lashing down, the wind has turned and it is blowing over 30 knots. Not the best weather to go on the foredeck and put out the anchor. We decide to float around while the thunderstorm passes, Maria also points out that where we were is still bathed in sunshine and it wasn’t her idea to move! She points this out quite vociforously. With limited visibility, I take over the boat and decide to check out exactly where we will be anchoring when the weather improves.
  Quite a few people ask us about how the cats are on the boat,
  particularly when we are doing longer journeys or the weather isn’t good. Bonnie and Clyde have grown up around boats and are very relaxed, on passages they will generally be in the cockpit with Maria and I or asleep downstairs. You can see how stessed they were at the height of the storm. It isn’t long before the thunder stops, well after three storms roll through, and the weather starts to improve and Maria takes over so that i can set up our anchor gear.
We have to reset the anchor because we weren’t quite where we wanted to be and at low tide it gets a bit shallow in the bay under the hospital school. Finally we are set up, anchor float attached to the anchor with a line that can be used to retrieve the anchor. Ten metre snubber line to ease  the strain on the boat and anchor, and several other snubbers making sure that even if we have a problem the windlass is never exposed to the yank of the chain. Anchor ball up and we are ready for our evening. When the rain was lashing down earlier, we had taken a look at our BBQ food and thought we may be in trouble here! With
  the change in weather we decided to have a Thai dinner rather than cooking in the rain and wind.
We settle down down for a quiet evening, Mariadz style… it was probably around 11pm when Maria decided she wanted to listen to music. Oh dear! The Louisa Johnson song where she laments that it was only ten how did it get to three, could have been written for Maria…..obviously three is just the start and if Louisa wanted accuracy she would probably have gone for five or six! This night is no exception and despite a couple of attempts to get her to go to bed, it is “just one more song” until 5am when Maria makes egg and bacon sandwiches before going to bed as most of our (sensible) friends are starting to wake up.  Later that day, we are “hanging”. It’s a lovely day, but a bit breezy. However, my hangover is not shifting and I go back to bed for a little while. While I am asleep, Maria chats to Amanda Furber, and agrees that we should all get together – I just need to pick them up from Harwich (4 miles away) in the rib like I am a taxi! I’m still not in a great state but I am sure the river ride will sort that out! While deploying the rib, there is a momentary stutter from the Davits as the motor stops and just clicks. But it comes back, so another one to put on the list of things that need to be checked. Just before leaving, Maria asks me how we are doing for fuel. On the rib, we have the main tank that feeds the engine and a reserve five litre can which is always full. The wind is blowing down the river towards Harwich and there is quite a swell. This doesn’t bode well for the return journey but getting there should be fine. We have only done a few miles so I’m sure the fuel is fine…..of course I get a mile downriver and the engine cuts out as the main tank is empty! so it’s lift the seats get the two cans out and transfer fuel from the reserve to the main tank, all while being rolled around, beam onto the waves.
  Refuel complete, I can restart the engine and get to Halfpenny pier to pick up my fare. Amanda and Mark are waiting on the pier when I arrive. I throw the rubbish into the bins and am ready to go. But Mark has a cunning plan, he will drive the car to Wrabness, slightly up river from us and I can get him there, it will be a shorter journey. Amanda joins me in the rib and we start to head off back to Mariadz. I may have mentioned that it was blowing 15-20 knots and the waves are quite deep, probably a metre from the tip to the bottom. We are making progress but it is not particularly comfortable. On the way to collect Amanda, I had remained dry for the entire journey, that wasn’t the case on the return. Amanda acted as a good water and wind break but I still got wet. Her back was also aching from the constant banging up and down and together we arrived at Mariadz wet and tired. Reading that last sentence back I should probably reiterate that this was a journey in the rib and nothing rude! I drop off Amanda and call Mark to find out where he is. He is on the far side of Wrabness with the beach houses and the mooring buoys. He has waded out to knee height as I approach and climbs in and we have a comfortable ride back to the boat with the wind and waves at our backs. On return to Mariadz, we go to the stern and decide to lift the rib back onto the Davits to avoid the rib banging the back of the boat overnight. We are clipped on but the stutter we had previously seems to be here to stay and the davits wont work. The rib is up enough for overnight and we decide to check it out in the morning.
I can now do the barbecue we have been  promising ourselves and we all settle down to a lovely evening in the cockpit chatting, eating and drinking. Mark is quite tired and bails responsibly early, i.e. before midnight, but Amanda has the bit in her teeth…. and a few drinks in her tummy. It is 3am (again) when we eventually all decide it is time for bed – someone will be feeling a little worse for wear tomorrow. The next morning we are up reasonably early since we need to get Mark and Amanda back to Wrabness. At this stage, Mark and I are beginning to think that since I added the 5 or 6 litres of fuel into the tank we have travelled six miles to and from Harwich and a couple of miles return to Wrabness which is now being repeated. It should be fine…. and I will fill up both tanks when I return to Ipswich. We get enough from the davits to drop the rib again but they are still playing up. It is a bit calmer for the journey back to Wrabness and I am able to drop them off quite close to the beach at high tide and they wade back in.
Now for the return journey to Ipswich. We are still getting nothing from the davits which appears to be an electrical problem, potentially something shorting out. I have checked in the control box and everything seems fine in there, no loose connections and voltage where I would expect it but I am no expert. Maria and I decide that we will have to tow the rib back and work it out over the next few days. We hardly ever tow a rib so we have a large mooring line to do the tow and two back up lines…a bit belt and braces, especially when the mooring line also has a shock absorber built in!
I go to lift the anchor, having previously checked that the davits electrical problem wasn’t impacting the windlass. This is reasonably uneventful and the anchor comes up surrounded by approximately a two foot ball of mud and weed!  It is a sight. I call Maria to come and take a look with Mariadz on autopilot and tracking down the middle of the Stour. As we return from the bow, Maria notices more white smoke than is usual coming from our exhaust. We check the temperature of the engine and it is above the normal working temperature. We reduce revs as I go down below to check out what is going on in the engine room. I am greeted by quite a warm engine room. At the best of times the engine room is a “no shirt zone” and this was hotter than usual. The water strainer on the aft bulkhead is completely green inside and it seems obvious that this is blocking water getting through to the engine. I explain the situation to Maria and we decide to get some sail up quickly and switch the engine off while I try and fix it. The clear lids on water strainers on Marine engines are great things, they allow you to see exactly what is going on. However, they do have a tendency to stick fast, especially if there has been any heat. Needless to say I can’t budge it.
I phone every chandlery along the Orwell to see if they have the specific devise designed to remove these covers but none have it. Our friends on facebook, where Maria had updated, are trying to make suggestions: hot water over the top of the cover to make it easier to shift, wd40 under the lid to try and budge it and a wet cloth to get a better grip. Nothing is working. Since there is no water in there, perhaps a vacuum has formed so loosen the feeder pipes and let the vacuum out before trying all of the above again. still nothing working. On Cliff Elgar’s advice, I try to wrap a line around the lid with a view to pulling and twisting the lid off. Again I am unsuccessful. By this time, Mark and Amanda have called us to offer some assistance and some tools! We agree that Maria and I will go along to Levington, pick up a mooring ball and meet them there. After 45 minutes of eventful sailing, a regatta of 50 odd boats was coming the other way and not really thinking about how we were going to pass between them, we arrive at Levington. Maria approaches the buoy perfectly with me midships as her spotter calling down the distance and angle of approach. In fact she sits Mariadz there so perfectly I could have had a cup of tea while I threaded the line and took it back to the bow to tie off. Once settled, I get in the rib and head to the marina to meet Amanda and Mark. They have stopped at Halfords and bought various tools that should give us a grip. They also have their dog, Milly with them, and most importantly a new 5 litre can of petrol for the rib! The four of us head back to Mariadz so that we can start to fix the problems.
Unfortunately the water strainer is being stubborn, none of the tools that Mark had brought were shifting it and we decided to review the rope technique again. With one minor adjustment, suggested by Mark, we had a better grip and the top started to move. In the end we had a loop in the end and the other end passed through this, this was then placed around the edge of the lid with the loop on the left hand side. The pull would then tighten and then move the knot anti-clockwise. With both of us pulling we start to budge the lid. We can now see the jumble of weed that is in the strainer, we clear this out, put everything back together and are happy that we have fixed the problem. Engine start and check the flow of water……negligible. oh dear, engine off. We should probably check the impeller. On the yanmar engine, in common with a lot of marine installations, the impeller is in a very awkward place where I have to unscrew panels to access the impeller and even then I am going under the engine and reaching up to the vertical plate. Our new lighting in the engine room is great but doesn’t get to this area which is still quite dark and you cant actually see it anyway because of its location. So you are groping around in the dark and you have to feel your way (as Olivia Newton John would say). It’s four bolts so release those, catch them so they don’t fall in the bilge (virtually inaccessible if they fall), as the last one goes, remember to catch the plate (similar bilge access issue!). I have the plate off and a firm grip of all the parts so we can see the impeller, it looks fine and moves as it should. Lets put it back together then. Plate in place, don’t drop anything, hand tighten four bolts and then tighten with the spanner, 1, 2, 3, snap! Now that’s unfair, one of the bolts has sheered but at least the other three are on tight which should stop any leaks. Another job for when we are back in our berth.
So we have established that the engine is trying to draw water in, and the problem has to be at the other end where the water comes into the boat. We decide we need to check the through hull. Take off the two jubilee clips and lift the pipe off the through hull….nope. That aint moving either! We have applied heat from Maria’s super hairdryer but still no progress. Eventually and with a rolling hitch we have successfully attached my trusty, water-strainer-lid-remover rope to the pipe and it does it’s magic! With the pulling of two of us we are able to get the pipe off the through hull. Now lets see if we have any water coming through the through hull or whether the problem is in the pipe. Open the through hull, just for a second, we don’t want to sink… a dribble of water comes out. We could leave this open for weeks before we would need to worry about the boat sinking. So there is a blockage on the though hull outside of the boat. So two techniques, firstly, wire hanger to clear any hard objects and the large brush under the boat from the rib to scrape away any weed.  We test the engine and we have flow and a six inch piece of weed goes straight into the strainer! At least we know what happened. Having removed this, the lid comes off without the threat of “the rope”, and put everything back together again we’re ready to go.
I drop Amanda, Mark and Milly back at the marina so that they can go for a walk and return to Mariadz for the last part of our epic journey home. We start up and everything is looking good, but within 200 metres the temperature is starting to rise and again we need to slow the engine down. By staying between 1,000 and 1,500 revs we can keep the temperature under control, less than 100, and we limp back to Ipswich slowly. This gives Maria time to cook a roast dinner for when we arrive – an advantage of having a great cook for a wife!
Coming into the lock is interesting, Maria has the boat well placed but, after she has stopped, I have to move the rib out of the way before I can bring the stern in. Everything is tied off, including the rib. Coming into the berth, one of our neighbours, Peter, offers to help and I throw him a bow line and ask him to tie it to the end of the pontoon so that we can use it as a spring to keep the boat under control while I tie her off. We’re in and safe and Maria has the engine off before I have finished tying us off, she has confidence in her man!
We can now inspect the damage over the next few days and fix everything….but first time for a lovely roast dinner.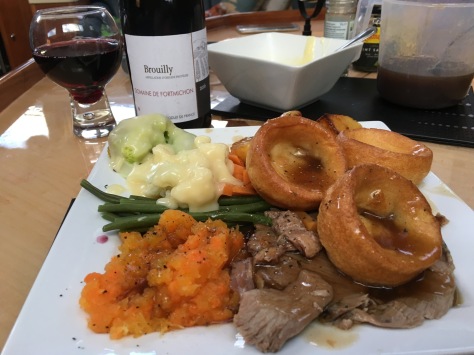

 Our new teacher has a slightly different approach and a new book (Contatti 1 Italian Beginner’s Course
 washing machine which is small and apparently designed for the yachting life. However, Maria wanted to see if there was a portable solution that would work on the boat, in the motorhome or in Italy before the main house was finished.
 she decided on a
  whether the

 Some of them do not have great access so someone with small hands is best. Firstly Houghton It is very important to completely empty the coolant before you start! We don’t want a messy bilge…. Each removed pipe is labelled so that we know what we have replaced and jubilee clips are replaced as required. As part of this work, various engine parts were cleaned up or replaced including the thermostat. By the end of this process we will have a pretty new engine 🙂 it takes quite a bit of time to do all of this work.
 I now get to see what I have to deal with… The entire mechanism is glued together with calcium, salt and lots of old grease which has hardened. The whole thing was solid and it is difficult to see how the thing moved in the first place.
 The bearings are equally bad with no movement. At this point I have to admit that the act of cleaning these things up and getting them back together is incredibly therapeutic and does give a great feeling of satisfaction when it is all back together again so thoroughly recommended. When I was young I used to try and fix broken alarm clocks. In common with a number of people I would take them apart and put them back together again, they never worked again and there were always a few spare parts lying around at the end of the process. It is important that this isn’t the case when rebuilding a winch! A nice way to try and stop this happening is to be very organised as the winch is taken apart.
  I laid out paper towel on the deck and had each group of parts on a single piece. I found this really helped to make sure that I put it back together in the same order as it came apart. As you can see, there was a lot of work required to clean these up and the whole process, with a few interruptions, takes a number of hours. There is no way I am getting the second one done on the same day.


 We had found that a bolt had sheered which held the casing of the alternator together. This had come out and had significantly damaged the vanes of the fan, which also explained the noise Maria heard. So we get the alternator off and I will take it to the local specialist to see what can be done. On investigation the alternator is fried and badly damaged which makes it uneconomical to repair. A replacement is available and should be with us within 24 hours.
 There is a problem, it appears the bolt holding the engine earth to the negative bar is loose (right hand side of picture). This has caused arcing between the cabling and therefore heat build up with some scorching. In fact one of the negatives has corroded and melted the insulation so much that it has melted through another wires insulation and these are welded together. That will be what caused our problems and it could even have been what damaged our alternator. In some respects we were probably lucky the alternator went rather than continuing to build the heat up and potentially start a fire under the bed. This doesn’t explain why the old alternator used to provide the earth to the engine and the new alternator doesn’t, despite being identical. The current view is that this was as a result of the damage to the alternator which provided that earthing thereby by-passing the corroded engine earth. But I will update with more information as it is available.


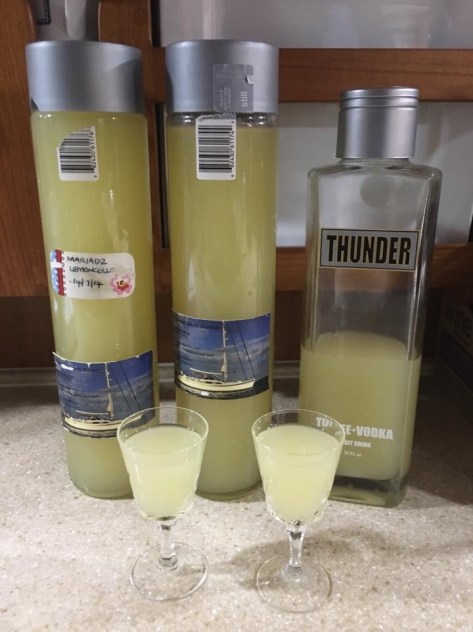
 Now leave it on the side for two weeks shaking and turning it each day.