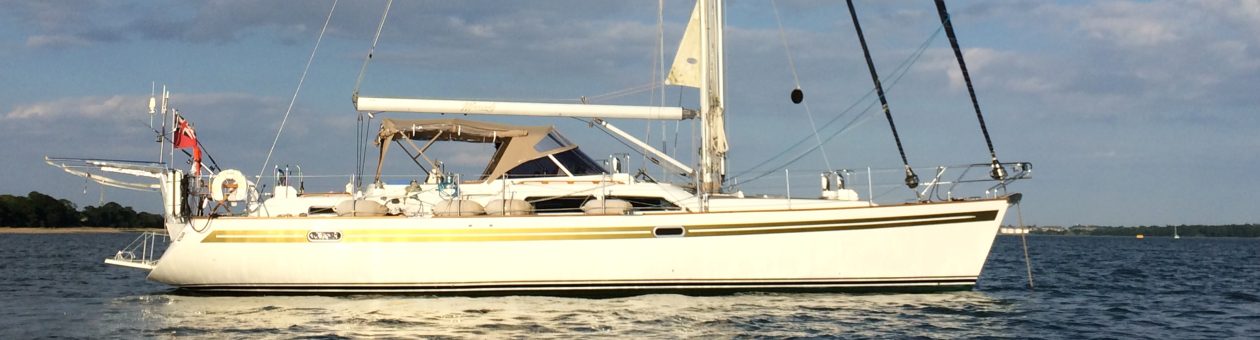

When our first boat chose us we didn’t need much of an excuse to go out sailing and sailed throughout the winter. We would be in our wet weather gear with wind and rain lashing down and still having fun. As it dawned on us that we could sail whenever we want and no-one was taking it away from us, this changed somewhat. With the fitting of a cockpit canopy on our Dufour, which had all round visibility, we still travelled in the winter but the dress code was more relaxed -Maria would be in a onesie or pyjamas.
When we moved aboard Mariadz two years ago, this changed a little more. One of our rules is that the boat has to be ready to sail within 30 minutes. Not because we are trying to get away from irate neighbours but because we found if you need a few hours to tidy away the clutter, the urge to go out wains. That rule has helped us a lot during the summer, especially if we are working from home the next day, since we are able to get out of the marina and down river to anchor. The world seems a different place then!
This helps us to get out a lot during the season, even if it is just down the river for a short sail and an anchorage for the weekend. Also because we are liveaboard the weekend gets extended as I have blogged previously… Liveaboard vs Weekend sailing . The cockpit tent on the Moody has also been a godsend, and if the weather is less than perfect, we are safely and cozily tucked up inside, with Maria again in her pyjamas!
However, since becoming liveaboard, when the nights draw in, we rarely venture out in winter. So now, in common with a lot of sailors, we do maintenance at this time.
In the winter, even staying in the marina, the cockpit tent comes into its own.  With two adventurous cats on board, we would be constantly opening the companionway to let them out. As an alternative, not because we are lazy but we would be doing it every five minutes, we hang a heavy curtain over the opening which they can squeeze past. However, this would let the biting north wind “squeeze” past too! Our spray hood has a zip in backdrop, which effectively acts as a mini cockpit tent, our porch! The cockpit tent itself also reduces the wind and cold getting to this place so effectively we are “double glazed”. It means that little cold will get into the boat which is also helped by some additional covered tubes like swimming noodles, that we thought would stop the cats escaping and keep out the cold. They are no good for stopping the cats – clyde just pushes past them!
So that explains the setup so what could possibly go wrong…. We like to keep warm and so the saloon is heated and some of this warm air will escape past the thick curtain into the cockpit tent. The combination of warm air and the cold air from outside causes damp on the inside of the cockpit tent, especially if the waterproofing is not perfect. This dampness is a perfect breeding ground for black mold.
We noticed this the first few years of having the cockpit tent and spoke to Dolphin Sails who cleaned up the canvas. But we recognised we needed to be able to sort this out on our own. Having bought all of the specialist cleaning gear for the weathermax and strataglass, we knew we could do it ourselves.
It is a multi-stage process that takes time and dry weather but it has been very successful for us. Firstly you need to use a mold cleaner to get rid of the black dots. Don’t be tempted to leave this on too long, most of them contain bleach and we don’t need to change the colour of the thing. Next use the cleaning fluid which will bring up the canvas like new. The final step is to reapply the waterproofer. A lot of people use Fabsil but Dolphin recommended one that we could only get from Germany but has done an excellent job Holmenkol Protection
, the postage was high but if you bought enough, and it took three cans to do ours inside and out, then it is less of a problem. So with a cleaned,”de-molded” and waterproofed cockpit tent we are ready for the winter.
There is one other thing we have had to do this year though to get the cockpit tent back to perfect. A number of cockpit tents use push studs to attach to the cockpit. Ours is attached by bungee chords which also means that it is adjustable if there is any stretch or as temperatures change. Unfortunately after a few years the bungee chords are UV damaged and stretched.  Replacing these is easy, and it gave us an opportunity to select what we felt was a better colour match. This is not an expensive or difficult job. We ordered 6mm Bungee Shock Cord
. Getting these to a tension I was happy with took some time but you just move the knots to shorten or lengthen the bungee before trimming and sealing the end (for which we use a gas lighter….gently). Doing sixteen of these meant that everything was as good as new and we are ready for a cold winter. We still had enough chord left to do this a couple more times so that is all in the spares store on board.
The first of the routine maintenance jobs is done.

 The safety aspect of the extension is evident but the additional space means that we can mount additional items on the pushpit such as our
  The design of the frame means that the grill slots into a round aperture which is braced on three sides so that the whole grill is held on the top bar and the bottom bar of the pushpit.
  This work is now completed, at the end of October, so not ideal BBQ weather but you know Maria will want to use it straight away 🙂 The frame can be easily removed and folds flat for storage or it can be left attached to the top bar and folds flat.
 Fortress FX-55 anchor that we have purchased to complement the 40kg Stainless Rocna anchor on the bow. The plan is to use this as a kedge anchor when required but also as a second anchor from the bow when tandem anchoring may be useful. The design of this was loosely based on a similar setup used by Discovery yachts on their 55s, which use the same anchor. The anchor should be available quickly after attaching a small length of chain and the anchor rode that is stored in the locker on deck. However, the East Coast Stainless boys took some time to make sure it was designed right and we are very happy with the results. To summarise the bar of the anchor is secured in a rounded part of the base which is attached to the toe rail. A box like structure at the top is used to hold the shaft of the anchor and the top of the blades. Hopefully the pictures below explain, although the mirror like quality of the stainless doesn’t help…… the shirt is in place as we wait for the rubber to be fitted which will lock in the top of the anchor.
 Finally, we had noticed when cooking that the wood behind the cooker gets quite greasy. We do a lot of cooking and I’m sure some of Maria’s recipes will be along shortly…. We already had a small splash panel that we had designed but this wasn’t doing enough and so we have protected the whole of the panel, up to the extractor fan, with an easily wiped clean stainless panel.
 We needed to replace all of the taps as part of the initial fit out. We decided to go with good quality domestic taps and found ones for the bathroom that had a “water saving” feature, which was as simple as a stop when the tap was half open! Still every little helps. At the same time we changed the plugs to push in which again stopped any problems with lost plugs or disconnected chains. Unfortunately it was only much later that we discovered that these had been fitted without PTFE tape and we unknowingly had a leak from the sink waste which was responsible for some of the water in our bilges. Now corrected, this area is bone dry and doesn’t contribute any more water below the floorboards.
 sucks air into the showerhead to make the best of the water power. We found a noticeable difference when using this compared to a standard shower head. Apparently the water comes out as bubbles which explode on your skin…..if you believe the marketing. 🙂 but it does seem more powerful than the old basic head.
 In the short term I had to put some string around this area to act as a door handle, potentially a sub-optimal solution to the problem as Maria very clearly and robustly pointed out. The replacement parts are made by Southco and this is an exact match for the broken part. Originally I tried to order these through EC Smith but due to some confusion and despite almost fortnightly reminders, these still hadn’t been ordered three months after my request. In the end I spoke to a very helpful lady at Zycology who had the part I needed in stock and got it to me within a couple of days. Fitting was easy and it was nice for Maria to be able to have a shower without the risk of being locked in there by the broken door mechanism – not much of a risk but it would have been hilarious for a few seconds before I was punished. You have to get your fun where you can.
 This was another idea we loved from the Moody 49 Mornin’ Gorgeous and I am sure they didn’t mind us stealing it. These are wall mounted and you often see them in pubs and clubs. It means that soap is always available, even when healed, with no soap bars lying in wait on the floor for the unsuspecting to fall over.
 There are numerous blogs on how this has been addressed, particularly on the outside but in the forepeak we have some cupboards with retaining catches. These were either broken or extremely rusted. It was difficult finding where to source these. Our Moody was internally fitted out out by Princess Yachts and having found the shower handle at surmised that other parts may have come from the same manufacturer. They also had the catches. This items were supplied by EC smith from stock. They arrived quickly and I set about fitting them. How difficult can it be to remove one and replace it with a new one…. one of the things I have discovered on boats is that even the simple ten minute jobs can bite you and this was no different.
  The catches were very different although they did the same thing, in fact the Southco catches are very professional and robust, looking a much more quality part than the original. With these catches, the mechanism fits on the door and there is a bar that it hooks onto on the frame. The bar on the Moody is angled because of the angle of the curved door and the one supplied is a right angle. Hmmm. Let’s just see how they fit together. Reading the instructions, it is clear that the catch is designed for a 90 degree door to frame angle. By trial and error, I work out that the right angled bar is just too long because of the extra angle of our cupboards. If I can file down the protruding part it will still hold the mechanism but when the catch is opened it will clear the bar and the cupboard will open. I discovered this the hard way by closing the cupboard and then being unable to open it, fortunately I had only put a retaining screw in and so I could shift the bar to the side to free up the cupboard. Otherwise, it may have been a case of “sorry dear, I crow-barred the door of the cupboard to get at the contents”. Boat jobs have a habit of catching you out like that. Fortunately, our friends on Valentine had an angle grinder I could use to file down the six retaining bars, otherwise I would have been hand filing the stainless – that would have been fun! With the bars down to half of their size, I fitted them again, and after getting the offsets right on the door and frame, it worked perfectly. Putting on the other five will be a proverbial piece of cake….of course not 😦 . Some of the screws wee so rusted that the screw dissolved when I tried to unscrew them. Fortunately, after much very careful effort, I was able to get all of the old bars off and throw away the rusty screws. Fitting was fine, with some minor adjustments needed to make sure that each catch fitted how it should. And we were done, a ten minute job had taken a shade over two hours! No surprises there then.
 check, even though we know we will be replacing it in the next year or so. This would make sure we were safe in the interim. At the back end of August, this was performed and as expected a few things came up which need rectification but nothing that was a safety issue (so lots of amber and no reds). The check was very thorough and the written report backed up that we were safe enough for the moment and also identified some of the changes that they would recommend when we go for the full refit.
 although I did also need to take the headlining down in the saloon to access the bolts under the organiser, some of which were on a bit tight. Having freed these, it did make me think that we have more work to do with the rig and we will discuss replacing the clutches and organisers as part of the rig refresh over the next few years. There were also a number of other easy fixes i could do myself such as tightening up the lines across the gates. That was also being redone as we extended our pushpit.
 However, the standard Moody 54 doesn’t have much pushpit space with two liferings, a danbuoy and, for us, a life raft already on there. With the davits also restricting options and two two aft seats taking up more room, it is a little tight to say the least.
 which gives us more room and a safer aft area. This would also provide more rigidity to the pushpit when combined with the reinforcement we put in the stern section previously when we added braces from the davits to the pushpit. The final item we needed to think about was the repositioning of the ensign required by the new solar panels. This was also intended to be rail mounted although I was keen to go back to a wooden pole rather than the stainless one we had previously.
 The finished job looks like it has always been there, just waiting for safety lines to be adjusted so that we can finish this part of the job. The best part is you cant see the join between the new and old elements of the pushpit, very happy with the workmanship again!
 original hydraulic rams, Bennetts in America. After sending various pictures and measurements, they were able to find the rams I needed (HL12CDA). I then had to wait for the next available transport to the UK, unless of course I wanted it delivered airmail which would be double the cost the of the rams themselves! I waited. The rams arrived and were ready for fitting and then I discussed with Lindsay when we could go about fitting them and getting the system working again. In the interim, Matt, a marine engineer and very good friend of ours, was visiting and I picked his brain. He persuaded me to do the ram swap myself and actually this transpired to be a lot easier than I imagined. I then needed to add hydraulic fluid (automatic transmission fluid) into the reservoir and bleed the system by using it and adjusting the flow to eliminate any air left in the system.
 Most of the pipes are metal sheaved flexible pipes but there is one copper pipe and unfortunately the (olive) joint was faulty and hydraulic fluid was squirting out of it and making pretty patterns in my lazerette. I took a look at this with Lindsay at Seapower and we discussed how to resolve the problem. The sensible decision was to replace the copper pipe with a new stainless steel flexible pipe. I went to the local specialists, Pirtek. After one false start, when i pressurised the system and the new joint failed spraying hydraulic fluids everywhere, we were able to pressure test the remade pipe and get the hydraulics sorted. I was back to being able to lift the platform but not drop it. Most importantly, after nipping up a couple of joints, we don’t leak even a drop of hydraulic fluid.
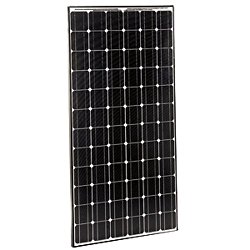 solid base for the solar and also allows us to have three large but lightweight (240W) panels which were
  This would mean that we would need to have a certain amount of headroom and the frame couldn’t be mounted directly on top of the davits even if we had wanted that. Another reason it needed to be raised would have been the console on the rib which sits proud above the level of the davits. These reasons, and aesthetics meant we wanted to have something that felt balanced with the boat. We worked with East Coast Stainless on the design and came up with a design that we think works. One of the design questions was about being able to tilt the mechanism, which is more efficient for solar (and creates more downforce, returning to a previous train of thought 😉 ). However, we had concerns that this would be cumbersome, heavier and fail over time as the combination of salt water and stainless welded the tubing to itself. We had exactly this experience with a telescopic boat hook that wouldn’t budge after it
  had been immersed in the sea and left for a few months. As part of this work we lost the Neptune’s fork that used to be mounted here but we had already moved or replaced most of the aerials that were on this and we didn’t want this to still be in place and potentially shade the panels. Some of the aerials were better mounted on the mast anyway. A few were left over which are mounted on plates to the side of the panels, providing a little shading but hopefully not impacting our solar output too much. When the fork was removed the davits suddenly looked naked until the frame went on, it was strange.
 had looked at how the power went into the batteries and had agreed with Olly on an MPPT controller which maximises the power going into the batteries by being very clever (please tell me if I am being too technical!). It takes a high voltage as an input and then converts this to the lower voltage required by the batteries. We went with the blue solar set up which is supplied by Victron since we had other Victron equipment and this gets great reviews. It also comes with a Bluetooth communications module which will allow us to monitor the solar array in its own right. All of our on board monitoring would give us a nett effect after any load had been subtracted, unless of course we switch off everything on the boat….so the ability to check the solar in isolation is useful. But it is also useful to know whether your batteries are being charged after considering the current load as a baseline.
 ith just one panel connected up and with rain water on the panel, which impacts efficiency, we were getting 4A going into the batteries which is all electricity we don’t have to buy off the marina or fuel for the generator. Now you even get money-saving tips from Mariadz 🙂

 The hull polish went very well and is a quick job because the surface is mostly flat. She came up beautifully. The gold vinyl stripe, which we intend to change next year to a painted stripe, is looking fine despite having been in place for over four years. So we can survive another year of that without doing anything major.
 we discovered that this needed very fine sanding with 400 and then 1000 wet and dry sand paper…… very gently! The dark crazing was removed and, after polishing, this area looked like new which was refreshing considering this had been a bugbear of ours for a few years.
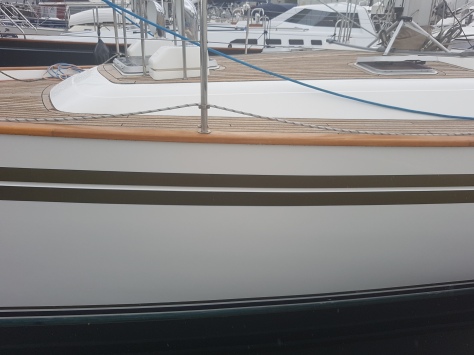

 I have been fortunate to have Pete and Linda as neighbours
 for the last two years and one of the things I have noticed as they fit out the beautiful Haven Voyager is that Pete designs a lot in cardboard before making it or buying it. This gave me the inspiration to mock up the steps prior to buying any wood or hinges! I can also thank my son Matthew for drinking the cider that made this all possible.

 There are basically three types of joint in the design. The outside of the box
  requires a joint that forms an L so that the top of the box is supported on all sides for stability. This means that the flush hinges need to be brought in by the width of the wood and recessed into the wood to provide a flush finish (I would now recess these differently to the picture with the larger part of the hinge being recessed but I did the first as in the picture and wanted to stay consistent at least on the inside of the box). Two of the concertina sides are joined to each side of the back using this method and the other two are joined to the top step in the same way, I used two hinges for each joint irrespective of size. Having built the U of the back and two sides and the same U shape for the front, we can join these together with the butt hinges. You now have a box with one end which is only half covered and has the front of the top step. We can now fit the top step itself, which is the top of the box, by fitting two flush hinges onto the top edge of the back on the outside and then the smaller top piece can be fixed. The larger top piece is then attached to the smaller with two butt hinges (on the inside). Our top step is taking shape. Now to avoid any unfortunate accidents it is a good idea to attach two bars on the underside of the longer part of the top step. These will stop the concertina collapsing inwards. They should be mounted a wood width from the outside edge and have at least a wood width on the outside edge at the front.
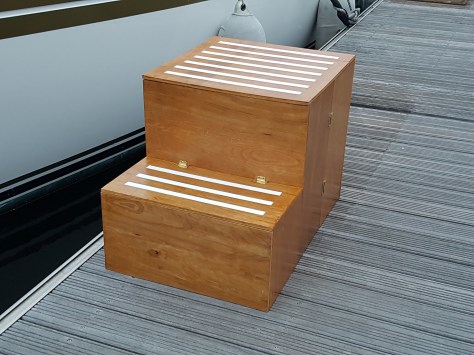

 Maria was going to be busy working so I asked Phil and the team to take Mariadz out of her berth which was done professionally and carefully. As she came out, there were quite a few barnacles and weed on her. We also checked the prop since we had quite a bit of vibration from the prop which you could hear in the aft stateroom when under power. There were a number of barnacles on the prop which could have caused the blades to not fully deploy and hence result in vibration, so the servicing of the prop is very important and something we need to check after its service. As part of the lift out service, Mariadz is pressure washed which cleans nearly everything off the hull and then she is put in her place for the next three weeks, as we move onto the motorhome.
 through hull replacement and Terry and Ben get started on this first. We quickly find that the hope that we would be able to keep some through hulls or even salvage some of the existing ones. Very quickly this became a pipe dream, as the through hulls started to come out.
  Some of them were wobbling in place, some were becoming pink inside (a definite sign that they need changing) and some of the valves would not close properly which of course is a big issue if you needed to close these in an emergency.
  The replacement goes really well despite some access issues and all of the through hulls are now changed. The two in the galley which also acted as keel coolers for the refrigeration are replaced with standard large through hulls and the keel coolers are moved slightly. These are changed from the vented coils to two porous blocks, with their own anodes, that soak up the water and cool the fridges. Apparently this is a new
  design which cannot be blocked by weeds etc. so we are hopeful that our fridge and freezer issues are finally solved for the last time. Also with the removal of the temporary fan solution, the noise in the galley has also reduced. The rekeying of the coppercoat is done with a light sandpaper after I have gone round and removed the last remnants of any barnacles on the hull. The hull anode which was replaced earlier in the year was also reasonably worn, but with some life left in it, but we decided to change this at the same time. The hull had been well polished and is looking fantastic.
 our berth we need to check for leaks and that the through hulls are seated correctly. Terry is on board and checks all of the through hulls. As he comes back on deck, he is pleased that out of nineteen through hulls, none of them leak. I’m not sure I’m 100% happy with the hint of surprise in his voice….only joking, they have done a fantastic, meticulous job and it is not surprising at all. We have some minor problems with the old pipes connecting to the new through hulls but these are all addressed and there is no water coming into the boat. Interestingly, we were told that when the one through hull was done earlier in the year, the boat had to be relifted because the new one leaked which makes us even happier with our decision to use Terry!