
Well there we go I have brought up the dreaded T word -TV.
There seem to be a number of schools of thought on this.
- I go sailing to get away from the modern world including television
- There is nothing to watch on TV these days
- What channels are you going to get in Fiji anyway
However, we have always been very keen watchers of films (movies for our American friends).
This work was originally done in 2014 when we first got the boat but has had to be refreshed. When we got her, the boat had a 20 inch TV permanently fitted in the saloon, 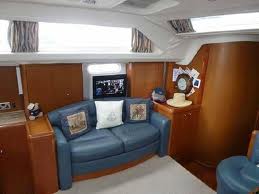 now we like watching TV sometimes but a) how will you see that from the other side of the room and b) who would want the TV on display the whole time anyway! When we had viewed the Moody 49, Mornin’ Gorgeous, prior to buying ours, we had admired the simple setup that hid the TV safely behind the seating.
  That was now our solution and it would allow us to have a large enough TV that we could both see and watch films on.
However, what TV to fit. At the time we did not have an inverter and I am also keen on a 12v solution to the problem. We had done something similar on the Dufour and bought a British made, or assembled, TV (Cello). This had worked really well and had a built in DVD player. When I looked at the options the largest 12v DVD TV that Cello produced was a 32inch, now that’s more like it. You certainly wouldn’t want the TV on display the whole time since it takes a lot of space. One downside on these TVs can be the sound quality but there are a number of solutions to that these days including soundbars and we bought a cheap sound bar.
Unfortunately my suggestion to emulate the simple, and cheap, solution for lifting and hiding the TV that we had seen previously received some criticism from my co-skipper…. So we looked at lifting cages with remote controls that would achieve the same goal, somewhat more stylishly. These cost more than the TV :(. But work really well and are more stable – quite useful for a boat 🙂 In the end we went for the Venset TS700A.
So now we have the means to watch whatever we like, even home videos of dolphins playing next to our bow :). Even better than that, if we don’t want the television up, it is hidden away and not obtrusive.
We originally bought two of the Cello TVs and mounted the second in the bedroom of the motorhome (now that is excessive!). Unfortunately, after eighteen months of not very much use, the screen went black on this TV so I was left with a decision to make. In the end I decided to swap the Cello out of Mariadz and use it in the motorhome. This limited any issues I would have with changing the power cable and the mounting. However, I then had to choose whether to get another Cello for the boat or whether to go for something with a better reputation. On the motorhome, we had the Avtex 187 TV (now Avtex L188DR 18.5-Inch Widescreen Super Slim LED TV with Freeview HD) and I had also bought an Avtex L218DRS 21.5-Inch Widescreen 1080p Full HD Super Slim LED TV with Freeview HD
for our bedroom. These are very good quality TVs with excellent resolution, a built in HD Freeview and satellite tuner. I have also been very impressed with the customer service throughout the three year warranty period which has the TV collected and then returned by courier within a few days. I decided to go for the Avtex L327TRS Super Slim LED Digital TV with SAT-Freeview and Record – Black, 32-Inch
. Unfortunately, the original fitter for the lifter had kept the bars that allowed the larger TVs to be mounted so I needed to get some stainless bars made up by East Coast Stainless to help with the mounting. We are very pleased with the result, in fact the earth loop, the buzzing noise from the speaker, also does not happen with the Avtex – that was getting a little annoying!

 This would then give a smooth finish for the woodskin to soak into. However, it is best to do this with your eyes open and not how I appear in the photo!
 So I started this on the Friday and soon had the handrails back down to a finish that was more acceptable. Having had issues with the woodskin getting onto deck, stainless etc as part of the application, I decided to use masking tape across the bases of each of the handrails. This did take time, since I wanted to make sure that the tape was shaped around the curved handle and provided the protection needed. By late on Sunday, after a glorious sunny day, I was ready for the first coats of the woodskin. The plan would be to apply a minimum of four (light) coats but realistically as many as we can since the depth of colour and protection gets better with more coats. The touch dry time is 4 hours and then 24 hours for it to be fully dry, so a reasonable week of weather and it will be done. I apply the first coat on all four handrails and it looks great so I can settle down, relax and admire my handy work. Five hours later, the first of the rain hits 😦 grrrrh! Fortunately it looks like the woodskin was dry enough but we waited for everything to dry out before adding the additional coats. So three coats down and it has consistently rained five to six hours after I have done them!
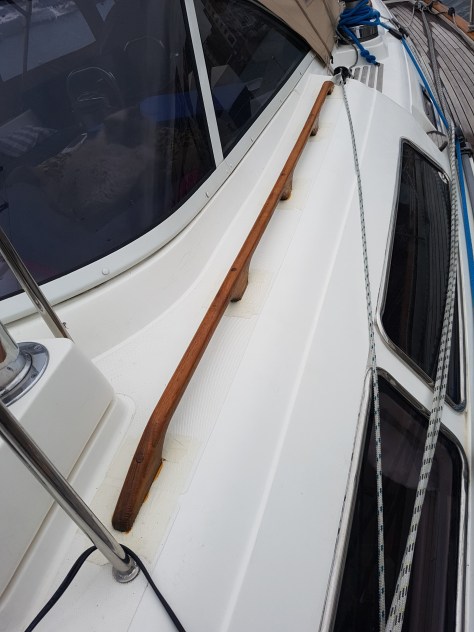

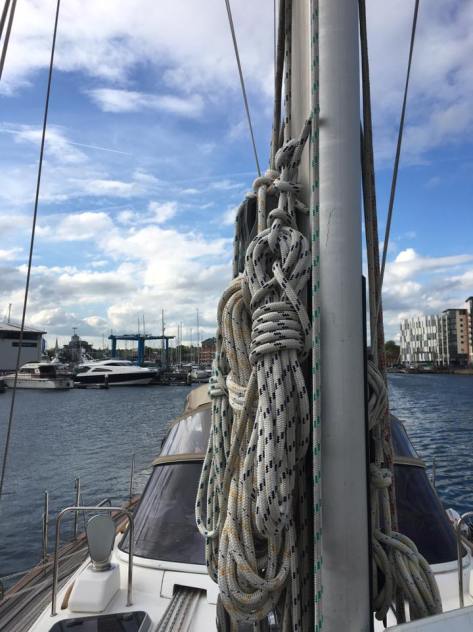
 You know it is bad when you can’t tell what the colour the line was underneath the dirt! The picture shows mid way through cleaning, the bottom green part of the line had already been soaked for a while and was a lot cleaner than when it started – although still disgusting!
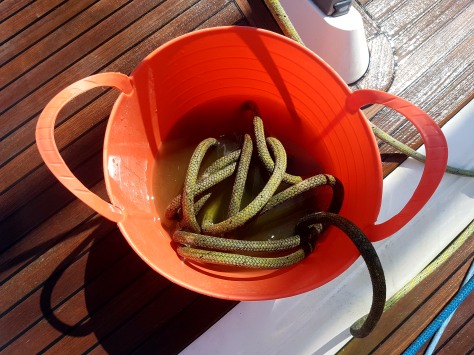 Our technique was to have a hot bucket of water with mild washing powder and fabric conditioner in it. Spray down the line with a hose to start with and then immerse it in the bucket for some time. Having given the water some time to get into the rope, I then painstakingly went through each metre of line with a soft brush, cleaning off the dirt.
  The final touch was to spray down the line with more cold water. It is tedious, hard work but very rewarding when you see the difference at the end, with the lines looking like new. They are also not stiff anymore so we should find that they work smoother and better than they did.