

Unfortunately, the saloon table had also been damaged and poorly repaired as part of the fire that had happened on the boat a number of years ago. We tried a couple of fixes but nothing really looked very good. We were really looking for the wow factor that made you think it was something special as soon as you came into the saloon. Now some people would have just said that was enough and lived with it…….but every time we would have come down into the saloon it would have been there and we would have seen it. Maria was keen to have a wow when you came into the saloon rather than a “nice boat, shame the table is a wreck!”. 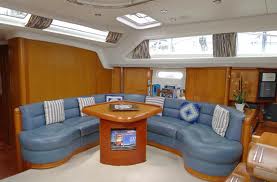 We looked at a number of options over a long period of time. Removing the poor veneer on the table showed more fire damage and the original wood was blackened from fire. We had success previously with the walls of the saloon being re-veneered and so we tried that, although the main part of the table was fine, there was a problem where the veneer got to the edges where the fiddle (grab rail on the edge of the table) was. We looked at whether we could put a fill in the corner so that the edge of the veneer would not show but everything we tried couldn’t deal with the very tight curves on the corners of the table.
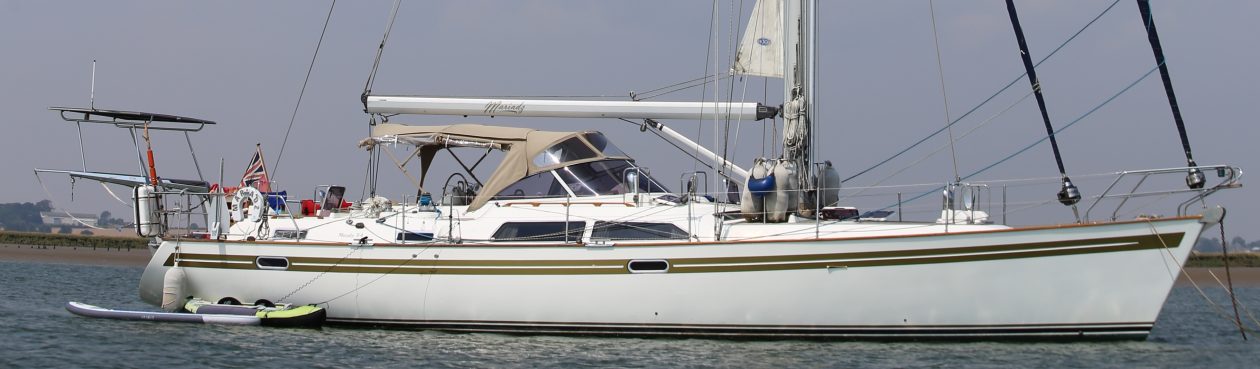
The overall design of the table is very good and the workings were still ok too. In the end we were starting to think that we would need to have a new table built. Our berth in Ipswich Haven Marina was adjacent to the Spirit Yachts area – the yacht made famous in the James Bond film Casino Royale.  This unfortunately meant that Maria wanted something that wouldn’t look out of place on one of these. We spoke to a few people and Kevin was recommended to us. Kevin discussed options and he agreed that he could do something special with the existing workings of the table that would be a centre point of the saloon and would give Maria the table that she really wanted. Kevin spent a lot of time on the table and designed it with two compass roses when the table is extended with the fold out insert in place. When the table is smaller it has a single compass rose. Kevin quoted for the work and we were happy. We subsequently found out that he is a bit of a perfectionist, hence why Maria likes him so much 🙂 and he took the time to do a really good job even though it coincided with the birth of his child. He cant thank him enough. While the job was being done, Kevin had left us with a plywood top to our table base so that we could still use it while the work was being done. In March, the work was complete and despite having to delay the install for a week because we were away, the install was ready to happen on the 19th March. Kevin had offered to send photos through but Maria was unequivocal in her desire to see the table for the first time when it was in place.
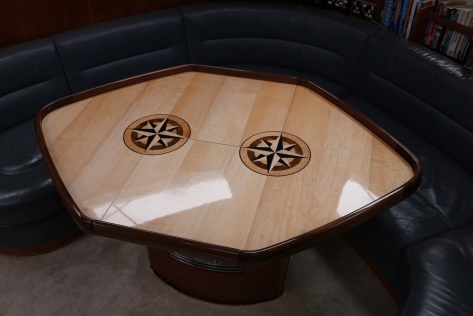 We are really, really pleased with the results.
The table looks magnificent and we are glad we decided to go for the contrast with the rest of the wood in the saloon because it makes it even more of a centrepiece. We have yet to see whether Kevin will decide to do some other projects for people, it isn’t his day job, but we can safely say that his attention to detail, eye and workmanship are fantastic and if he does choose to do more of this we are sure he will be a huge success.

 The upgrade was to use the toilet version of this pump. This is equivalent to the more powerful of the two grey water pumps but has a much wider pipe, let’s not linger on why that is required for a toilet pump…..
 (the ones that disguise screws and make them look like the headlining or woodwork. These had jammed across the pipe together, which was little wider than these at the bend. This stopped all flow, especially as they had been packed in with hair and assorted other gunk. On cleaning this out we put the whole system back together and tested.
 gets you one of these stainless steel little puppies that fits the plug hole perfectly, has a very fine mesh that catches rice grains etc and looks like it is standard fit. So all those problems could have been averted for less than two pounds….
 of course throws the compass off 😦 . we looked at the design of the standard steering column and were a little confused. Engine hours is important to keep an eye on but does this really need to be on the helm? We decided to move it down below. There were also some redundant switches. By carefully rearranging the steering column, with Olly from Seapower’s help, we were able to come up with a better design that also fitted in the chartplotter and the control panel for the Forward Facing Sonar. The radio bracket has been moved
  away from the compass and the new remote control for the autopilot has also been mounted on the pedestal. Another change was removing the standard key to start and replacing with two buttons. At the end of the day the keys are all standard and so add no security but can handily (?) break off in the ignition at times. We just need to make sure that the ignition is switched off from the master control down below to avoid someone taking Mariadz away. Finally we added LED lights to light up the table when needed.
 This time, we decided to bite the bullet and buy a couple for our bedroom. We would have to find a cheaper solution for the other cabins.

 the mast or the boom we wanted to add some lighting.
 We went with the e-xpert lite based on Olly’s recommendation. Over time, these type of monitors become less accurate though and need to be reset but they do provide useful data about what is happening right now such as amps in or out. However, anyone with an understanding of our approach to the refit will not be surprised that we would not be happy with a single way of measuring these things which could become inaccurate. There is another type of battery monitor which has a very complex algorithm within it and measures the battery itself to calculate a percentage of charge in the battery bank.
  This system actually gets more accurate over time as the algorithm helps it to tune it’s settings to “learn” about the batteries it is monitoring. The combination of these two monitors gives us a powerful way of understanding our power use and state of charge. This will allow us to manage our power use much more effectively. We can monitor and adjust our power use and it will also help us to understand the effectiveness of our charging mechanisms: engine, shore power, generator and solar power. We will report on how well this works in practice in future posts.
 The victron had some good features but the Studer seemed to have a better reputation for quality. The clincher for us was the global support network. They are both good but there are several times more dealers and repair centres for Victron, so in the unlikely eventuality that we had a problem, it would be easier to repair.
 By choosing Lindsay at
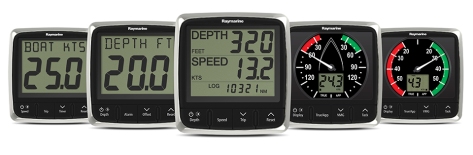
 On the left hand side there were two chart plotters. The Raymarine was original fit and was linked to the similar unit in the cockpit. Around about 2010, AIS had been added and rather than upgrade the navigation a decision was taken to add an additional plotter to show the AIS information. Personally the thought of going below to check the AIS track of a large ship that may be on a collision course sounded like madness. Also with our plans to go round the world we didn’t expect the original navigation to last 25 years without trouble. So the decision was taken to upgrade the Raymarine navigation and remove the redundant setup. We considered other manufacturers but we have been comfortable with Raymarine equipment and so decided to stay loyal to the manufacturer, also thinking that it should be quite easy for us to understand how it worked since it would be an evolution from the equipment we were used to.
  Of course an upgrade from that period meant that the existing radar set up would have to be replaced.
 Forward Facing Sonar (FFS) so that we can see exactly what is in front of us and hopefully therefore avoid hitting it! Now on the East Coast, where we have very shallow water and mud, there is an unwritten rule that if you haven’t touched the mud you probably aren’t really trying ;). We are very careful these days having touched the bottom once in the Dufour but I am guessing that running into a reef will be no laughing matter so FFS it is. It looked like the Echopilot was the best fit for us and integrated with everything else.
  We have combined that with a 7inch plotter which will show this view to Maria at the helm. I am led to believe that the purchase of this equipment was no reflection of a lack of trust in my ability to tell Maria if we are going too shallow but a niggling doubt remains… 🙂